(Last updated on March 6th, 2023)
Cycling is a great sport and is consistently growing in popularity. One of the best things about cycling is the bikes. They come in all shapes and sizes and are designed for different disciplines. If you get the cycling bug, you will probably have multiple bikes and go on many adventures.
A common issue that people struggle with when having multiple bikes in storage. We have to get creative for many of us who don’t have a huge amount of space. An ideal solution for many of us is to use a bike hanger. In this article, we’ll tell you about different bike hangers and how to use them.
What is a Bike Hanger?
Before telling you how to hang a bike, we need to start by discussing what a bike hanger is. The ultimate purpose of a bike hanger is to help you store a bike efficiently. It can help you save space or just get the bike into a safer place. They are an ideal solution if you have a garage with lots of other things in it. A bike hanger comes in many different styles. Here are some of the most popular;
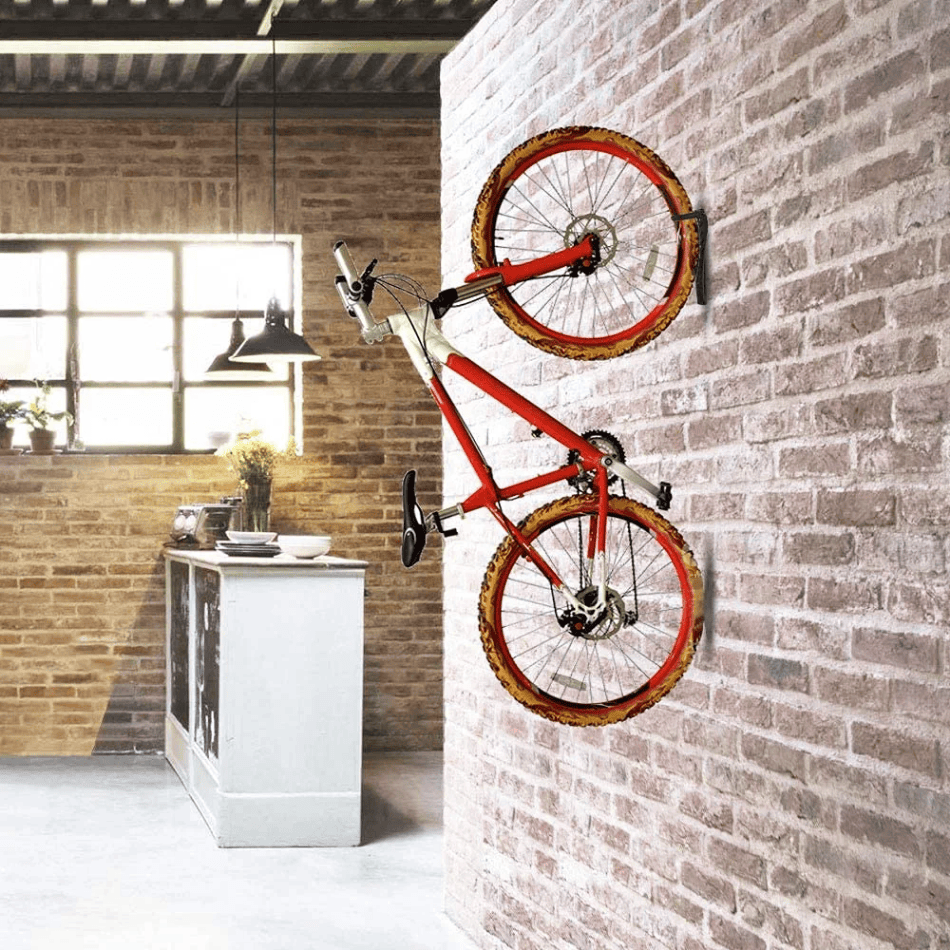
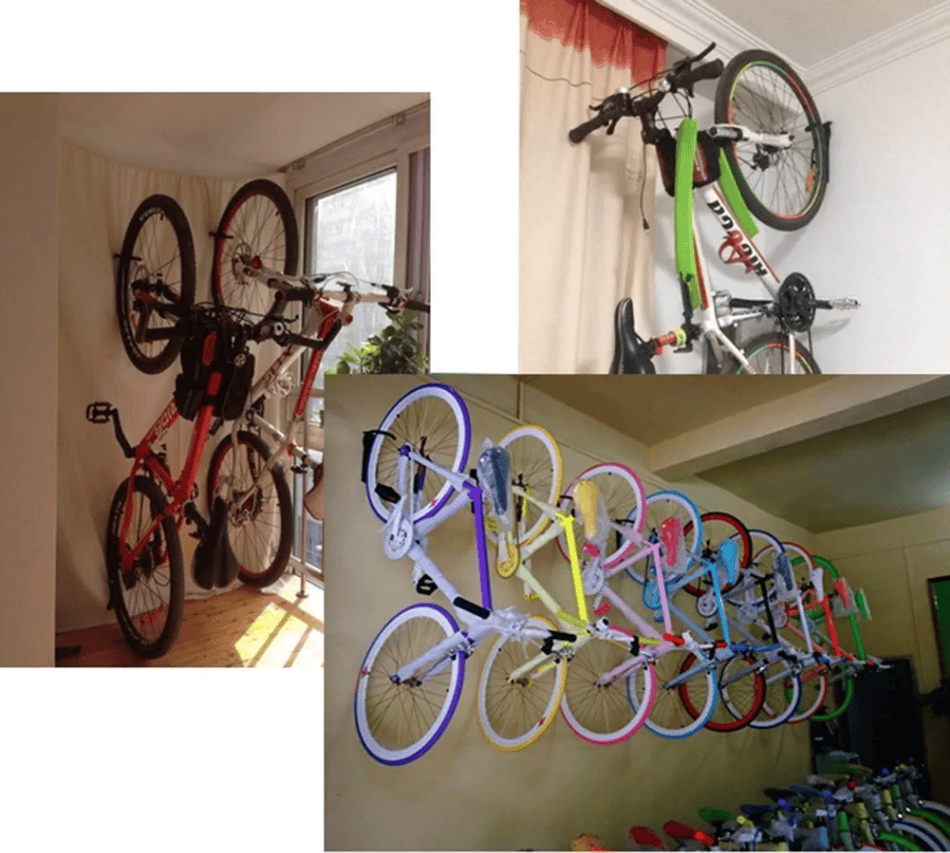
Vertical Bike Hanger
PROS
- Small and won’t get in the way
- Easy to mount
- Keeping the bike vertical is great space saving
- Very cheap to buy
CONS
- Can only fit one single bike
- Don’t work with deep aero rims
OUR VERDICT
Vertical hangers are the cheapest and probably the best way to hang a bike.
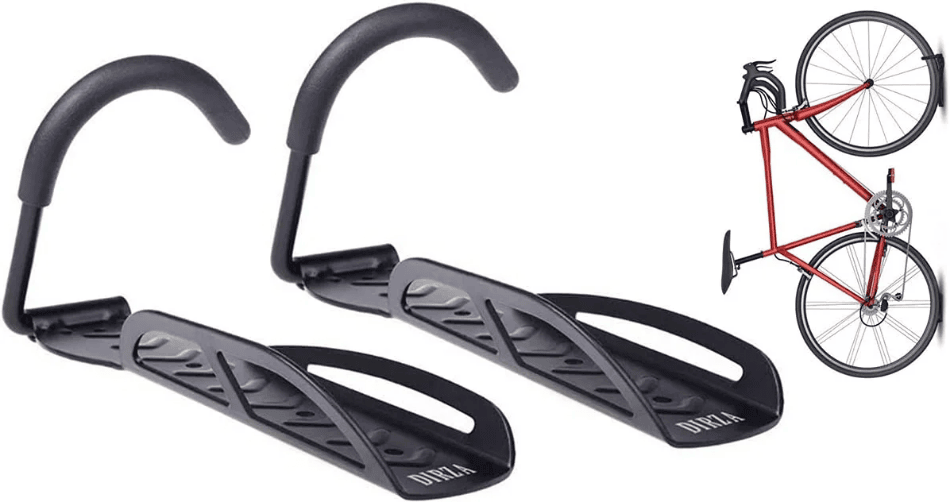
EXAMPLE
The Dirza bike rack is an example of an excellent vertical bike hanging rack you will find. They can only fit one bike and are great for space saving. With this hanger, it’s easy to take bikes on and off. You typically buy them in pairs, and they cost less than $20, which is an incredible value.
Weight limit of this hanger is 65 lbs.
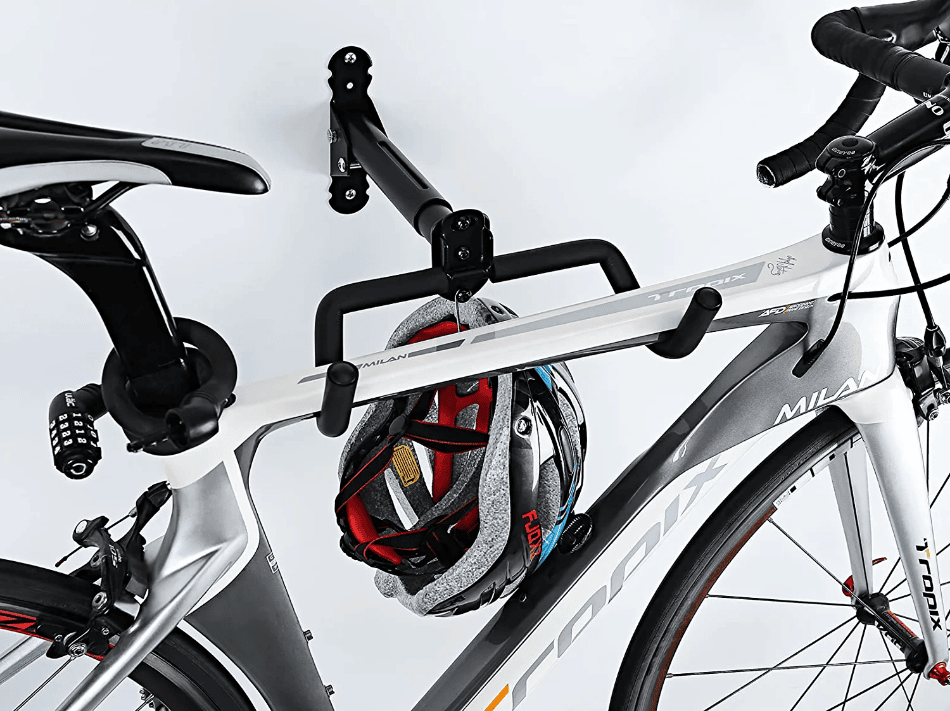
Horizontal Bike Hanger
PROS
- Very easy to use
- Great for showing off a bike
- Easy to get the bike on and off
- It works with practically every bike
- Can work on the bike in the hanger
CONS
- It takes up a lot of wall space
- Can only fit one bike
OUR VERDICT
The horizontal bike hanger is it is ideal if you have two bikes, but not the greatest if you have three or more.
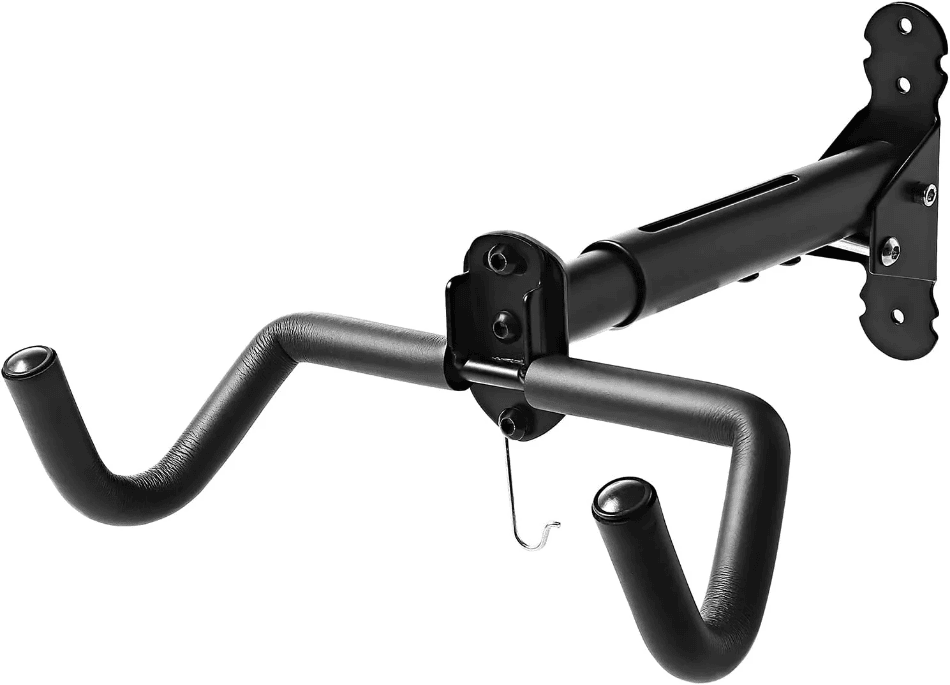
EXAMPLE
The Gootus is one of our favorites regarding horizontal bike hangers. It is great for saving space and sits on the strongest point of the frame’s top tube. They are not expensive, coming in at about $25. The weight limit on these hangers is generally around 50 lbs.
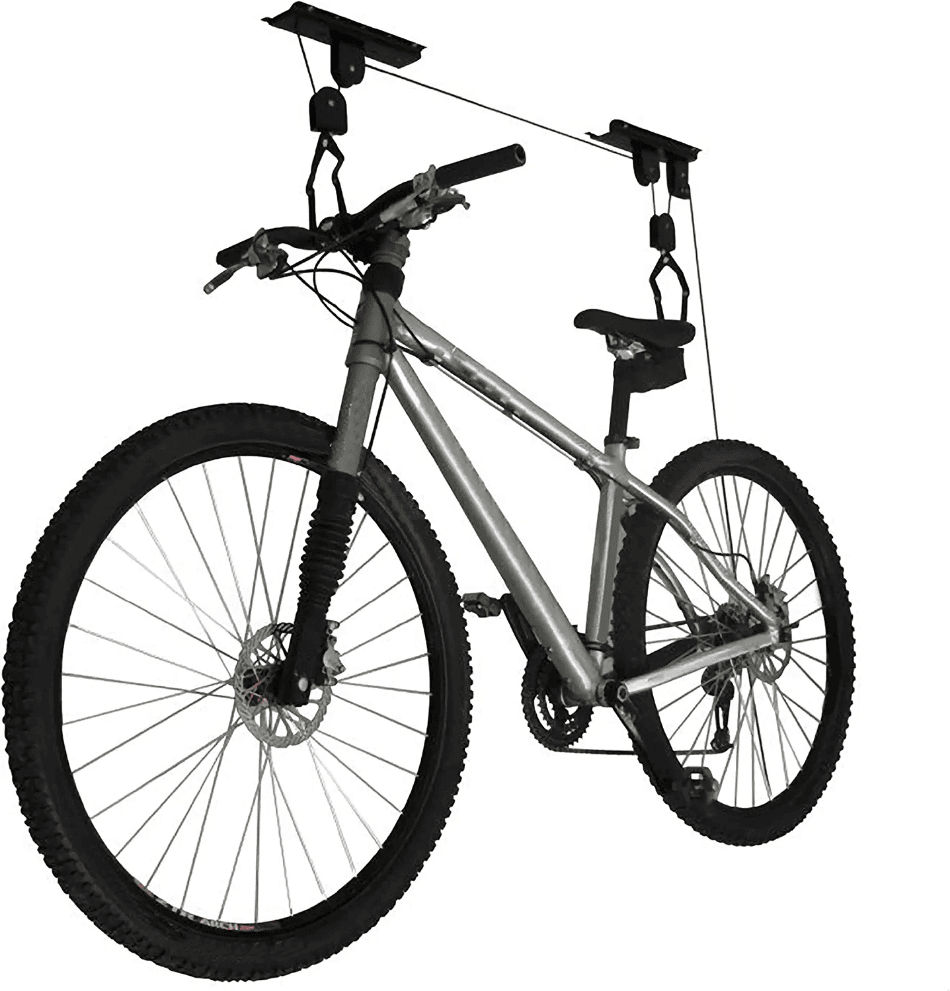
Hoist Bike Hanger
PROS
- Great for high ceilings
- It doesn’t take up any floor space
- A very fun way to hang a bike
- You can work on the bike in this hanger
CONS
- It takes longer to fit
- Unless you have very high ceilings does get in the way
OUR VERDICT
The hoist bike hanger is that it’s great if you have high ceilings but if not then it’s not going to be very useful.
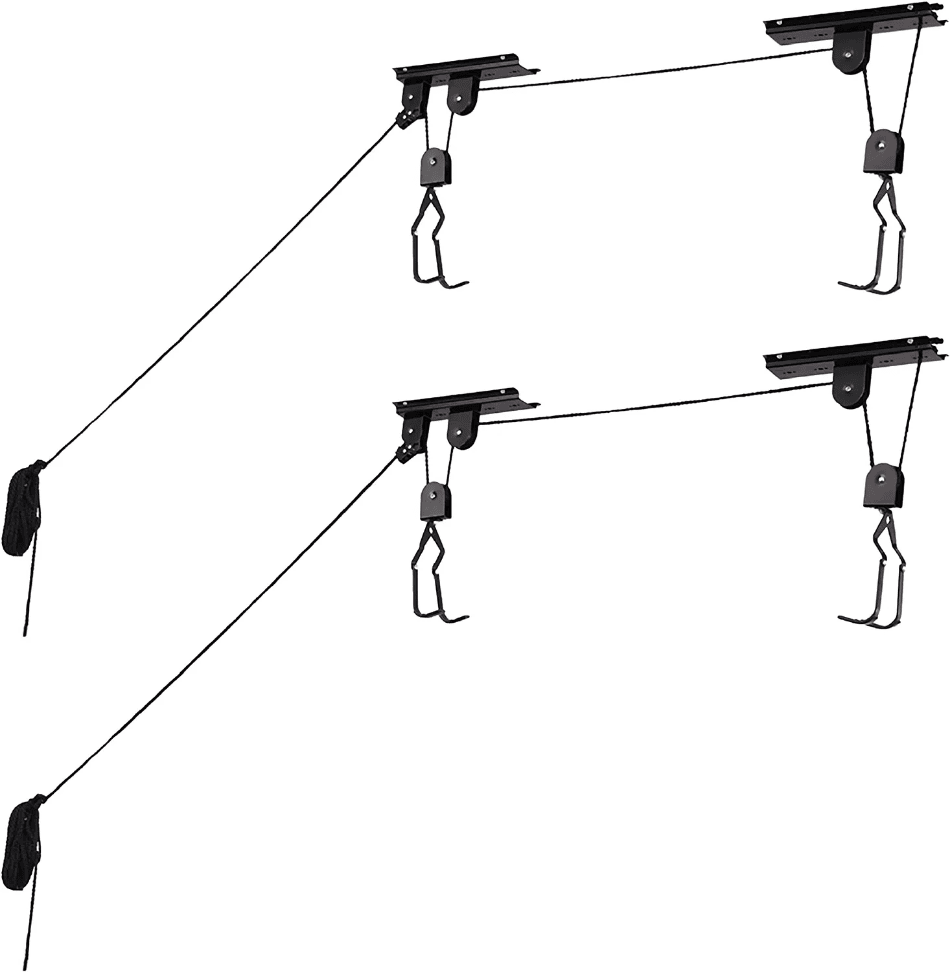
EXAMPLE
The final type of bike hanger is the hoist bike. These use a pulley system and are excellent if you have a high ceiling. They take a little longer to set up but save a huge amount of floor space. Coming in at $30 for two, great value. The hoist typically has a weight limit of around 100 lbs.
Benefits of Using a Bike Hanger
Using a bike hanger has a lot of benefits, and it’s a must-have accessory for anyone who wants to store a bike in a garage or a house. Here’s why;
Space Saving
The first thing to mention is that it’s great for saving space. Using a hanger removes your bike and gives you more room to play with elsewhere.
Keeps the Bike Safe
Using a hanger has an added advantage in that it keeps the bike out of the way of other things in the garage that could damage it. A good example is if you use the garage to store a car, it minimizes the chances of driving into it while parking.
Security
Many cyclists use bike hangers as an anchor for a bike lock. Instead of just locking the wheel up, it sticks it to the wall making it much harder for thieves to steal from you.
Convenience
One thing I particularly like about a bike hanger is the convenience. It makes it so easy to get to the bike as it’s out of the way of other stuff in my garage. Some hangers, like horizontal hangers, are good for keeping the bike still while working on them.
How to Use a Bike Hanger
Now you know what different types of bike hangers there are on the market, how do you use them? In this next section, we will discuss how to use each.
Vertical Bike Hanger
Let’s start with the vertical, and this is one of the easiest to mount and use and quickest to mount. We recommend this hanger for single bikes and would avoid it if you have deep aero rims.
Step One: Measure
The first step you need to take with a vertical hanger is to get it mounted onto the wall. You will need a pen and measuring tape, and grab the hanger. You will need to measure your bike and ensure the rack is mounted higher than the bike’s length. When the rack is in the right place, use the pen to mark where you will make holes.
Step Two: Mount
Now you need to mount the hanger to the wall. Depending on the surface, you might need to drill wall plugs in prior. The screws are provided, and it will typically need two screws in. You will want to ensure it’s got the hook at the top. When it’s on the wall, we recommend applying some pressure to ensure it’s secure.
Step Three: Hang the Bike
To use a hanger properly, you will want to support the bike’s front wheel with the hook. The easy way to do this is first to pull the bike’s front wheel in the air. Then rest the saddle on your knee and push it up onto the hook, gripping the rim.
What to Avoid Using a Vertical Hanger
When using a vertical hanger, here’s what you will want to avoid doing to ensure it hangs properly and safely.
- Ensure the tire is inflated and you rotate it every so often if leaving it for a long time
- Try not to let the hook sit directly on a spoke nipple
- We don’t recommend electric bikes, as these can be too heavy
- Only ever mount one single bike per hook
Horizontal Bike Hanger
Next, we have the horizontal bike hanger. Like the vertical hanger, the horizontal hanger is very easy to mount. You can have it done in about 20 minutes. We recommend hanging any bike on these, providing they fall under the weight limit.
Step One: Measure
The first step is to measure where you want to put the bracket. Many people mount one above the other when it comes to horizontal hangers. We recommend hanging if hanging one, go high or low. In between does waste space. Get the hanger where you need it, take a pen, and mark where you need to drill.
Step Two: Mount
Now you need to get it mounted to the wall. If using wood, you can screw it in. If you are going into brick, you must drill and insert a wall plug. Go to the pen marks and make the holes. With the holes made and wall plugs in, get the rack on and screw it to the wall. Once on, check it’s on properly by applying some pressure.
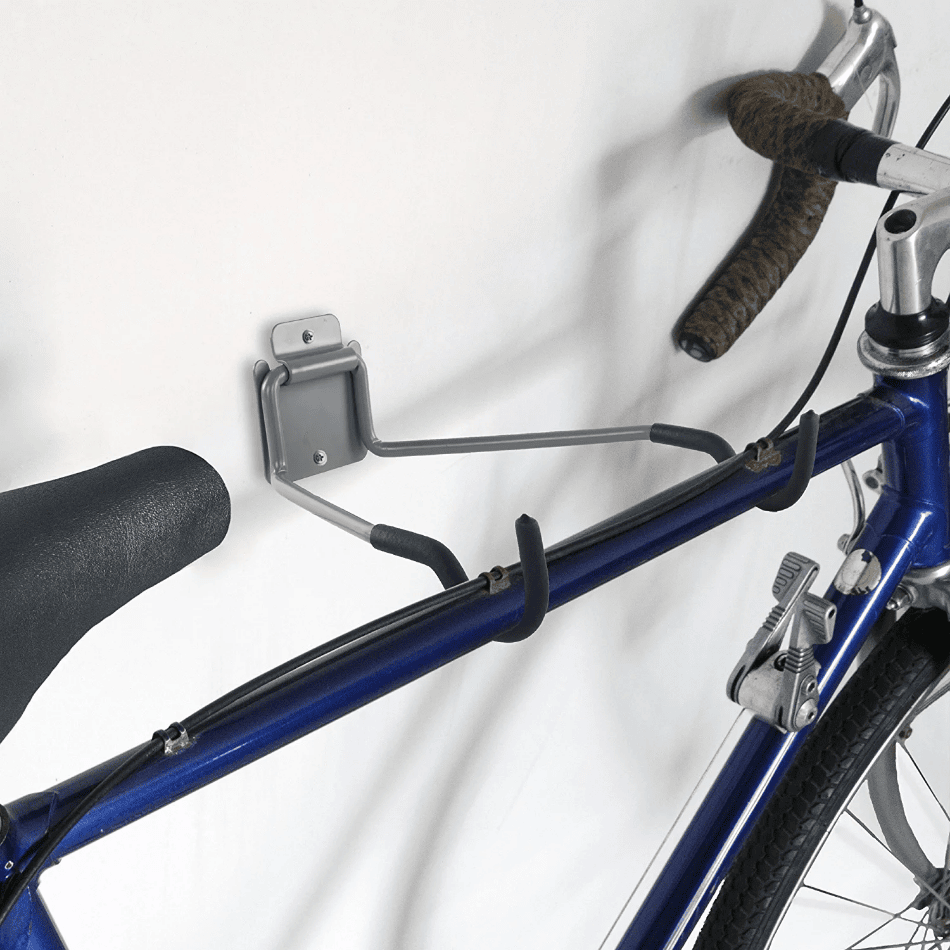
Step Three: Hang the Bike
Using a horizontal hanger is the easiest way to hang a bike. You can see it has two arms that stick out. These are going to need to hold the top tube of the frame. Pick the bike up safely and pop it onto the hanger, and you’re done.
What to Avoid Using a Horizontal Hanger
When using a horizontal hanger, here’s what you will want to avoid doing to ensure it hangs properly and safely.
- Ensure you pick the bike up safely and lift with your legs, not your back
- These hangers don’t always hold the most weight ensure the bike isn’t too heavy
- Try not to mount it anywhere it will get in the way or could cause danger
Hoist Bike Hanger
Finally, we have the hoist bike hanger. You need to ensure you install it perfectly as it sits the bike very high in the air and has many more parts to it.
Step One: Measure
When it comes to the hoist hangers, you need three brackets to get into place. The majority of people hang these on the wood supports in the ceiling. Firstly you will need to measure the back of the bike’s saddle to the handlebars.
Then take the roof brackets to the supports and mark where they need to be with a pen or pencil. Once they are marked, you need to get to the wall bracket in line with the roof supports.
Step Two: Mount
With all the measuring done, you will now need to mount all the brackets. If you go into the wood on the roof supports, generally, wood screws will work fine. On the wall pulley support, you might need some wall plugs.
When mounting the system, it’s good to make sure the rope on the hanger isn’t tangled and runs correctly through the system. This will ensure it will work properly and make it easy for you.
Step Three: Hang the Bike
Now the fun bit, hanging the bike. Take the first hook, put it under the saddle, and ensure it grips properly. Then get the second hook and place it under the handlebars. You will then need to go to the wall support and pull the rope, which will take the bike toward the ceiling.
With the bike suspended in the air, you need to secure the rope on the wall bracket. You will wrap it around on most of these pulley systems multiple times to ensure it doesn’t come loose. Now you have the bike hung.
What to Avoid Using a Hoist Hanger
When using a hoist hanger, here’s what you will want to avoid doing to ensure it hangs properly and safely.
- Firstly when using the hoist, make sure the hooks are secure
- We recommend not hanging the bike above people or anything that the bike could break
- With the wall support, you want to make sure it’s very secure
- Although the weight limit is high on these hoists, be cautious
Our Recommended Products
Vertical Hanger
Our recommended vertical hanger is the Dirza Bike Hanger. It’s great value for money and comes in a pack of two. They are easy to install and come with everything you need. Here’s where you can find them: Dirza Hanger.
Horizontal Hanger
Our recommended horizontal hanger is the Gootus. Unlike many other hangers, it comes with protective sleeves and can be folded away. Here’s where you can find them: Gootus Hanger.
Hoist Hanger
The hoist hanger we recommend is the RAD sports. It’s very good quality, easy to mount, and offers great strength and support for those heavy bikes. Here’s where you can find them: RAD Bike Hanger.
Conclusion
Hanging a bike in a garage is a great way to save space and keep your bike from getting broken. We hope you enjoyed our guide on how to hang a bike in a garage and feel confident to install a hanger and start using it.

I’m Robbie Ferri, a writer from Norfolk in the UK. I love cycling, the gym, and have a huge passion for sharing my stories and knowledge to anyone with the time to read them. My main passion is cycling. I started eight years ago. In that time I have broken world records, cycled all over the world in Ultra Bikepacking races, and am lucky enough to have enjoyed some incredible times on two wheels with some incredible people. I have also worked in a bike shop and with some of the industries leading brands, not just promoting products but designing them too.
Under it all I am just someone very passionate about exploration and living a healthy lifestyle. Everything I do I put 100% into it and feel that life is for living. Never should you have a dull day.