(Last updated on March 29th, 2023)
Working on your bike can be just as fun as riding it. We highly recommend learning basic bike maintenance skills, such as adjusting bike brakes and removing pedals, as it will save you money and time. What a lot of cyclists do is invest in tools instead of paying bike shop labor.
One of the most common jobs you will find yourself doing on a bike is adjusting the derailleurs. It’s not rare for bike gears to start to get sloppy, making the riding really uncomfortable. In this article, were going to be telling you how to adjust derailleurs by speaking about:
- What Is A Derailleur?
- How To Adjust A Bike Derailleur Rear
- How To Adjust A Bike Derailleur Front
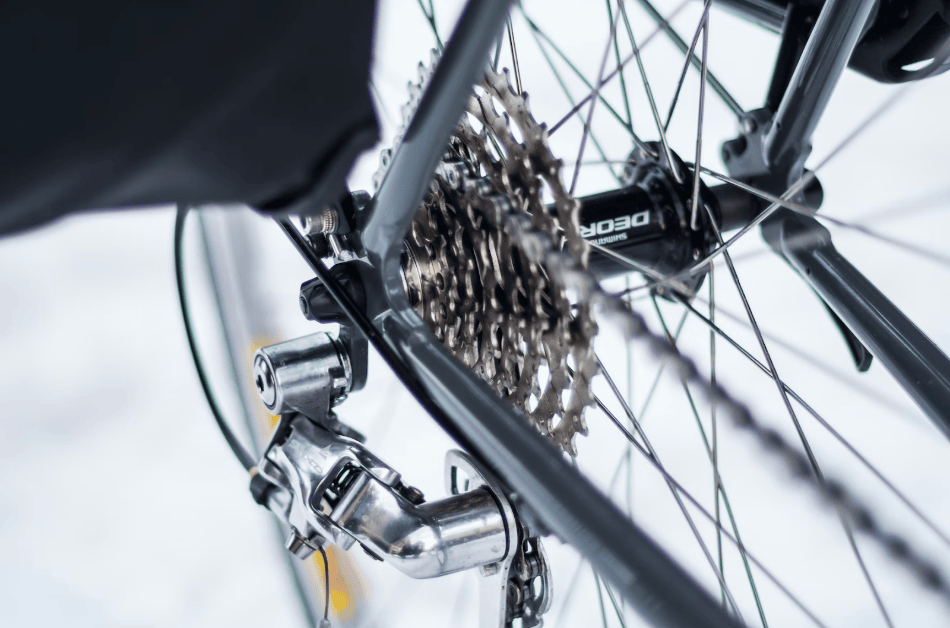
What is a Derailleur?
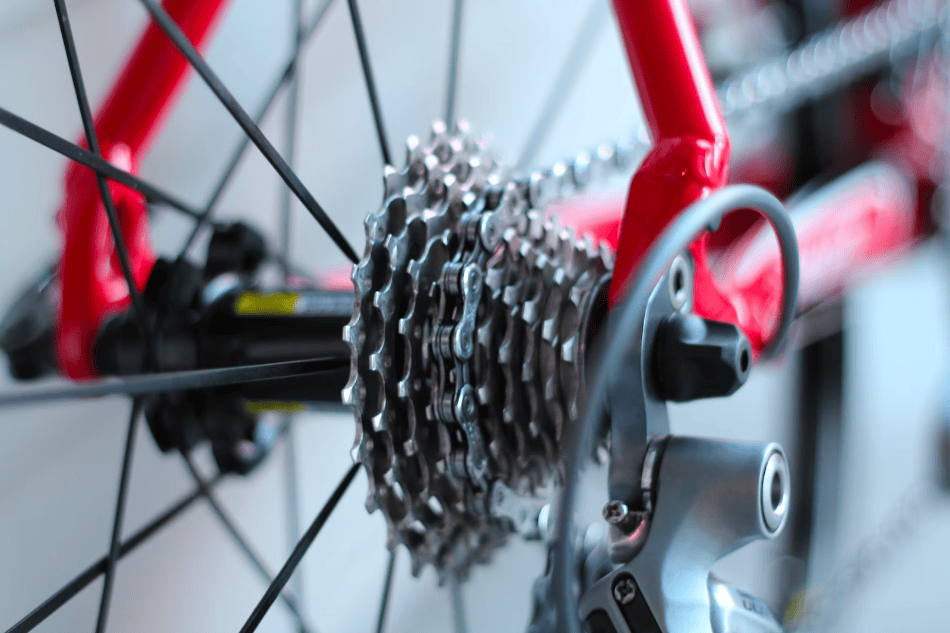
A derailleur is part of a bike that allows you to change gears. What’s interesting about derailleurs is they generally only touch the chain when they need to push it across to another cog. They are only on bikes with gears, and you typically have one or two different derailleurs situated on the front and back of the bike.
Derailleurs come in all shapes and sizes and are typically controlled by cables. It’s not rare for a derailleur to come out of adjustment. There are many reasons why you might find yourself needing to adjust a derailleur, such as:
- You are installing a new derailleur or swapping one across from another bike
- Your cable might have stretched over time, and the derailleur has lost adjustment
- You might have had to replace the cable altogether. Now need to dial it in
- You might have changed your bent rear mech, and now your gears skip
How to Adjust a Bike Derailleur Rear
Here’s our step-by-step guide on adjusting a rear derailleur. We recommend allowing an hour to complete the job and taking your time to get it right. You will need the following:
- An Allen Key Set
- A Small Phillips Screwdriver
- A Bike Stand
You will want to get your bike in a stand and need enough space to spin the bike cranks while the wheel can move safely.
Step One: Correct Gear and Release Tension
You will first want to get the bike in the correct gear to adjust the derailleur. You must go into the biggest chainring on the front first and the smallest cog on the rear cassette. This would be the toughest gear on the bike if you were to be riding.
So use your shifters to get into the correct chainring at the front and the correct cog on the rear cassette. Spin the pedals to ensure it is in that gear so it doesn’t jump out.
Once you have done this, you will want to get your Allen keys and then go to the rear derailleur and release the cable tension bolt. You will find this where the cable attaches to the derailleur.
Step Two: Set the High Limit Screw
Now you are going to need to set the high-limit screw. You will find two screws on the derailleur with an L or an H next to each other. These limit how far the chain can move around the cassette at the lowest and highest point.
When you turn the pedals, if you can’t get the chain into the smallest cog or it goes too far, you can adjust this to get it to the right place. Turn it anti-clockwise to go up the cassette and clockwise to go down the cassette. Ensure it sits on the small cog and pedals smoothly.
Step Three: Index the Gears
Now you need to get the gears indexed correctly. First, you must take the barrel adjuster on the rear derailleur and fully screw it in. Now you will pull the cable tight while in the lowest gear on the shifter and tighten the Allen key bolt, which grips it.
Start turning the pedals and then go down a gear on the shifter. You will find it probably won’t shift as it should, so head to the barrel adjuster and start turning it outwards until it jumps up.
Then shift back down to the smallest cog and repeat the process working your way up every cog. Each time it doesn’t shift up, you will want to slightly tighten the adjuster until you smoothly get all the way to the top. Once at the top, run up and down gears, and they should work smoothly.
Step Four: Set the Low Limit Screw
Then we come to the low-limit screw. This is for the biggest cog on the cassette, and we want to ensure the chain doesn’t fall into the wheel and can still hit the largest cog.
Using the L screw, you can adjust it inwards and outwards. We recommend putting the chain into the highest gear at the top and turning the pedals to gauge where it sits. If it goes into the wheel, screw it in. If it doesn’t reach the top cog, then unscrew it.
Step Five: Set the B Limit Screw
Finally, we have the B Limit Screw. This is a small screw at the back of the derailleur you might find needs adjusting. You probably won’t need to touch this. When you are in the largest cog, if you find the jockey wheel is rolling on the cassette, you can tighten the B Limit Screw, and it will pull itself away.
How to Adjust a Bike Derailleur Front
Here’s our step-by-step guide on adjusting a front derailleur. Again we recommend allowing an hour to complete the job and take your time to get it right. You will need the following:
- An Allen Key Set
- A Small Phillips Screwdriver
- A Bike Stand
You are going to want to get your bike in a stand, and you are going to need enough space to spin the bike cranks again.
Step One: Ensure the Derailleur Runs Parallel
The first thing you will need to do is ensure that the derailleur runs parallel with the chainring. To do this, look at the derailleur cage from the top and line it up with the biggest chainring. If it’s not inline, you will need to undo the Allen key bolt where the derailleur attaches, and you will be able to move it around.
Step Two: Adjust the High and Low Limit Screw
As we did with the rear derailleur, you must set the high and low-limit screws. Shift up to the largest chainring and turn the pedals to get the chain on it. Then look above and sit the derailleur cage 1mm out from the chain, stopping it from coming off the top.
Then shift down into the smallest chainring and pedal to let the chain cross. Here you are going to want to do the same. You will again ensure the cage sits 1mm off the chain, stopping it from falling off the bottom.
Step Three: Adjust the Cable Tension
The final step is to adjust the cable tension. This can be tricky, but you must be patient and trust the process. We recommend that you release the cable from the derailleur first.
Then you will need to screw in the adjuster screw, which is either on the cable itself or on the derailleur. Once you find it, screw it fully in. Now reattach the cable, pulling it finger tight when you do.
Starting in the smallest chainring, try shifting up to the larger chainring while pedaling. More than likely, it won’t go. Keep turning the pedals and tighten the cable tension until it jumps across.
When it does drop back again, try shifting up again. If it’s smooth, then you have it in place. If it takes time to grab, you must adjust it until it’s perfect. Now we recommend giving your bike a ride to ensure it is working.

Conclusion
Well done! You now know how to adjust derailleurs. It’s a great skill to learn and will save you a fortune regarding bike repairs and shop labor. There are a lot of different skills you can learn, like measuring bikes to help you become a better cyclist on and off the bike. Thanks for taking the time to read our article.
If you liked this article, you might also like:
Frequently Asked Questions
You will know if your derailleur is misaligned if your bike doesn’t shift properly, can’t get into all the gears on the cassette, or the chain falls or at times.
Chaining a derailleur will be around $40 at a bike shop. That’s generally all labor charges. They might recommend a new cable or other parts on top.
If your bike isn’t going into gear properly or doesn’t shift well it’s definitely time to get your derailleur adjusted.
You should only change your rear derailleur when it doesn’t work properly or is underperforming. Generally a derailleur should need replacing if looked after well.
A misaligned derailleur will either need a new hanger or the old hanger bent back into place. We recommend a new hanger.

I’m Robbie Ferri, a writer from Norfolk in the UK. I love cycling, the gym, and have a huge passion for sharing my stories and knowledge to anyone with the time to read them. My main passion is cycling. I started eight years ago. In that time I have broken world records, cycled all over the world in Ultra Bikepacking races, and am lucky enough to have enjoyed some incredible times on two wheels with some incredible people. I have also worked in a bike shop and with some of the industries leading brands, not just promoting products but designing them too.
Under it all I am just someone very passionate about exploration and living a healthy lifestyle. Everything I do I put 100% into it and feel that life is for living. Never should you have a dull day.