(Last updated on January 30th, 2023)
Bikes are designed to get us moving and rolling swiftly, but to reach our destination safely, we’ll need to be able to come to a stop reliably. The braking system is one of the most important parts of the bike for safety and reliable performance.
- How Do I Know I Should Adjust My Brakes?
- Get a Quick Diagnosis of the Problem
- How to Adjust the Braking Pads
- How to Adjust Cable Tension
- 1. Test the Cable Tension by Pulling Each Brake Lever
- 2. Turn the Barrel Adjusters for Minor Cable Tension Adjustments
- 3. Undo the Anchor Bolt That Holds the Brake Cable at the Caliper
- 4. Pull More of the Cable Than Before Through the Anchoring Point
- 5. Make Any Small Adjustments Using the Barrel Adjusters
- Got Disc Brakes? Here Are Some Tips
- Tips for Long-Lasting Brakes
- Frequently Asked Questions
If brakes fail, you’ve got around two options: use your precious shoes to skid on the ground to slow you down or try to jump off, hopefully into some plush bush or grass.
I don’t know about you, but I don’t like either of those options. Use this article’s step-by-step guide to adjust your brakes and ensure you’re riding safely.
How Do I Know I Should Adjust My Brakes?
The first part of adjusting brakes is recognizing that your brakes need to be worked on. It’s a good idea to visually inspect and test your brakes every once in a while, but you can normally have a solid understanding of your brakes’ performance simply by riding. Here are some common clues and brake issues that tell you that it’s time to adjust your brakes.
Problem 1: I’m squeezing the brake lever a lot, but it barely slows me down
This frequent issue can come about suddenly or over a long period of time and can be a serious safety hazard. Unresponsive braking can be a liability when you need to stop quickly for unexpected obstacles. You’ll need to adjust the brake cable tension.
Problem 2: My brakes are squeaking
Noisy, screechy brakes can still offer plenty of stopping power, but the annoying sound can be a ride-ruining experience. This happens more often with a combination of cheap quality brake pads and rims but can affect any bike. Whether it’s an irritating sound or a sign that there’s something wrong, fixing squeaky brakes is always a good idea. You’ll need to adjust the brake pads.
Problem 3: My brakes feel weird or they aren’t as sensitive as they used to be
This situation can be a harder one to diagnose because the brakes still get the job done but do so with less efficiency. This can mean trouble when you need to stop suddenly and can decrease rider confidence out on the trails or roads. But a quick adjustment, cleaning, or brake pad replacement should solve this problem.
Note: These brake problems are just the most common issues. There are all kinds of braking systems that vary in design and complexity, so you may experience other brake issues. Most of the issues can be solved with adjustments explained in this guide, but others warrant a trip to your local bike shop for some in-person service from a mechanic.
Get a Quick Diagnosis of the Problem
Once you think your brakes need adjusting, make an initial diagnosis to determine what specific area needs adjusting. Most bike brakes work via a lever tightening cable that causes brake pads to clamp the wheel rim or disc brake rotor. That system can span from the handlebars to the rear wheel, so it’s a good plan to locate the specific problem area.
- Inspect the brake lever on the handlebars to ensure the cable is attached correctly. Sometimes they pop out, get kinked, or get damaged which can make pulling the lever either too hard or not do anything at all.
- Check the brake cable and housing that runs from the lever down to the brake caliper. The metal cable and its plastic housing can get kinked or escape from their mounts. Old bikes often need the housing replaced because of gunk and rust build-up.
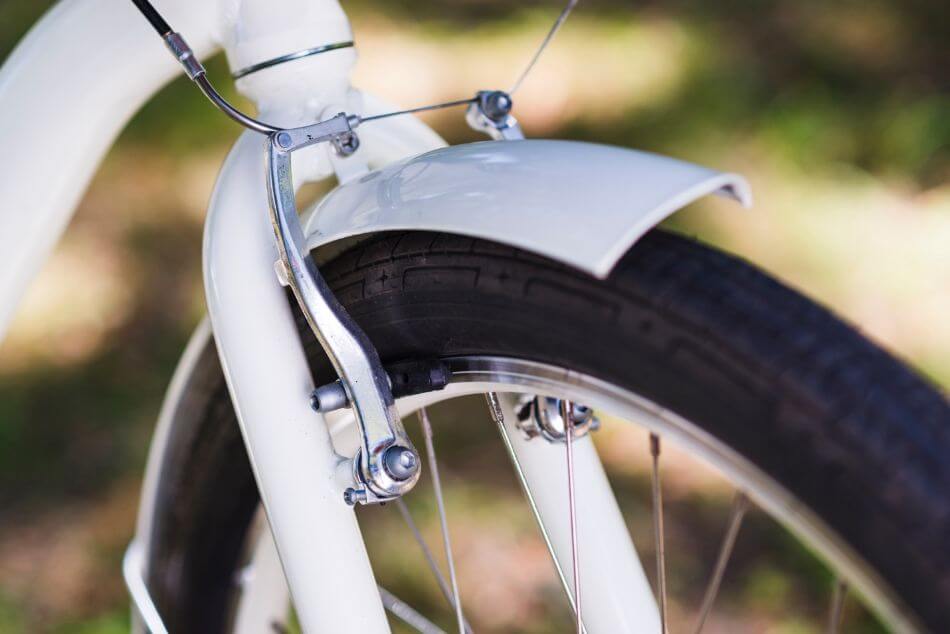
- Look at the brake pads and where they contact the wheel rim. The pair of pads should hit the rim simultaneously and sit flat that is, no part of the pad should hang off the rim or touch the tire.
- Also, check if the pads are too worn down and need replacing. There is a wear line on every pad. If they’re past that point, they are probably making a sound and can damage the rim.
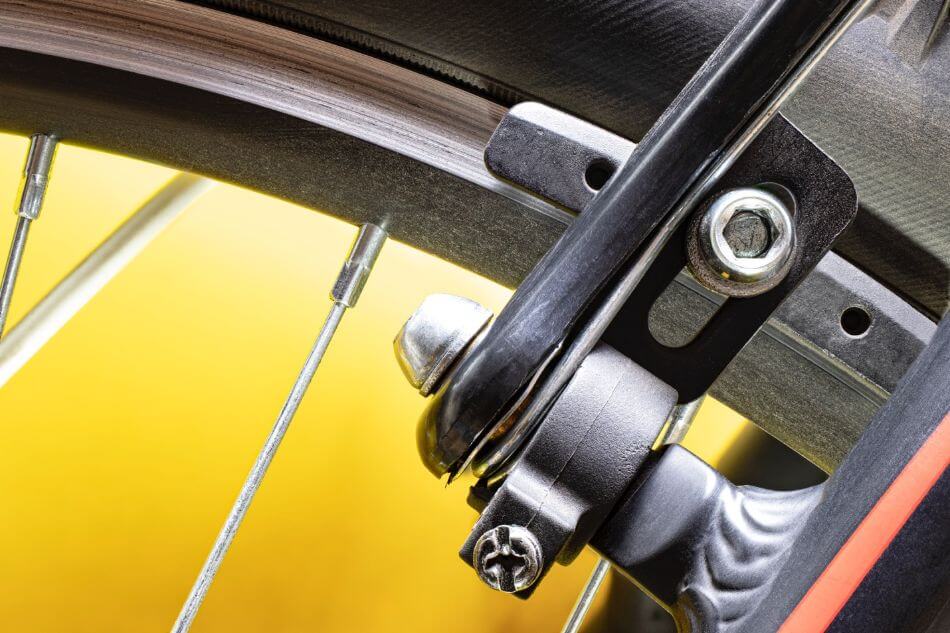
How to Adjust the Braking Pads
1. Squeeze the Brake Lever and Watch Where the Pads Hit the Rim
The pads should make contact with the center of the rim and do so at the same time. Pads too high will rub the tire and wear a hole through the rubber. Pads too low will wear unevenly since only part of the pad is being used.
2. Use an Allen Wrench to Loosen the Bolts That Keep the Brake Pads Tight
Use the right size Allen wrench or hex key to loosen the bolt so the pad can move around slightly. Don’t unscrew the bolt completely or the brake pad, and its several tiny parts, will fall out of the caliper.
3. Move the Brake Pads Up, Down, and All Around
This is the most important part. Adjust the loose pad so it sits flush in the middle of the rim when the lever is squeezed. It shouldn’t be angled up or down, and each end of the pad should be roughly the same distance away from the rim.
- Common “V-brake” calipers have set screws at the bottom of the brake arm. Tighten the set screw to move that pad further away from the rim. Loosen the screw to move the pad closer to the rim. Make sure both pads are at an equal distance from the rim.
- A trick is to lightly squeeze the brake lever while the pad is loose and has been adjusted to the correct spot. This keeps the pad in the right position, so all you need to do is tighten it up.
Tip for Squeaky Brakes
“Toeing in” the pads
To “toe-in” brakes is to angle the pad, so the front-most end of the pad is slightly closer to the rim than the rear-most end. When the brakes catch on the rim when you pull the lever, the angled pads favorably hug the rim and are less likely to squeak.
Re-Tighten the Brake Pad Bolts and Check the Positioning
Turn the Allen key clockwise to lock the brake pad in place and squeeze the brake lever several times to check how the pads kit the rim. Make any necessary adjustments.
How to Adjust Cable Tension
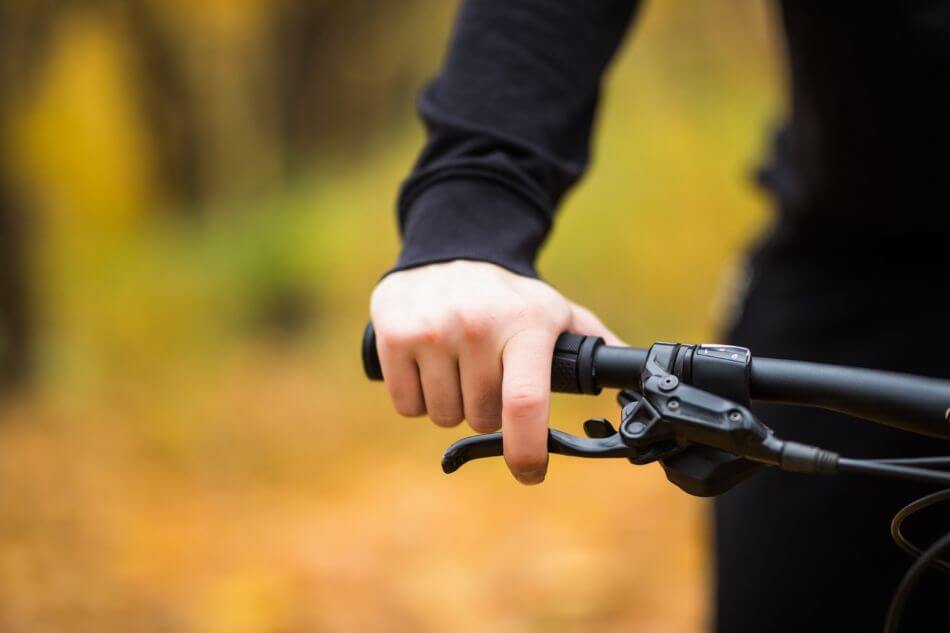
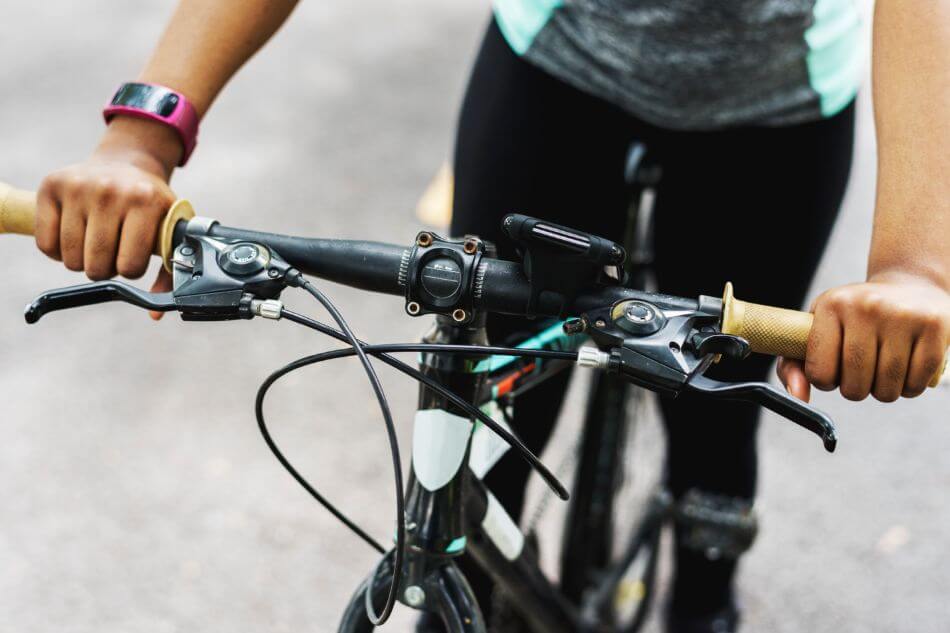
1. Test the Cable Tension by Pulling Each Brake Lever
Squeeze the brake lever and observe how much force it takes and how far back the lever goes toward the handlebar. When you pull back the lever, it shouldn’t be less than 1” to 1.5” from the handlebar grip.
If the lever is very difficult to pull back or doesn’t engage the brake caliper, there may be too much friction in the cable housing. Detach the cable and add some lubricant down the plastic housing to free up any dirt or rust. In serious cases, you may need to replace the cable and housing and install a fresh set.
2. Turn the Barrel Adjusters for Minor Cable Tension Adjustments
If you want to make a small change to the cable tension, barrel adjusters are your best friend. They are designed to alter the tension without having to use tools to play around with bolts and the caliper.
Loosening the barrel adjuster (counterclockwise) from where it meets the lever effectively tightens the cable to add tension, moving the brake pads closer to the rim. If you need to loosen the barrel adjuster by a lot, it’s best to make that larger adjustment down at the caliper (see the next step!).
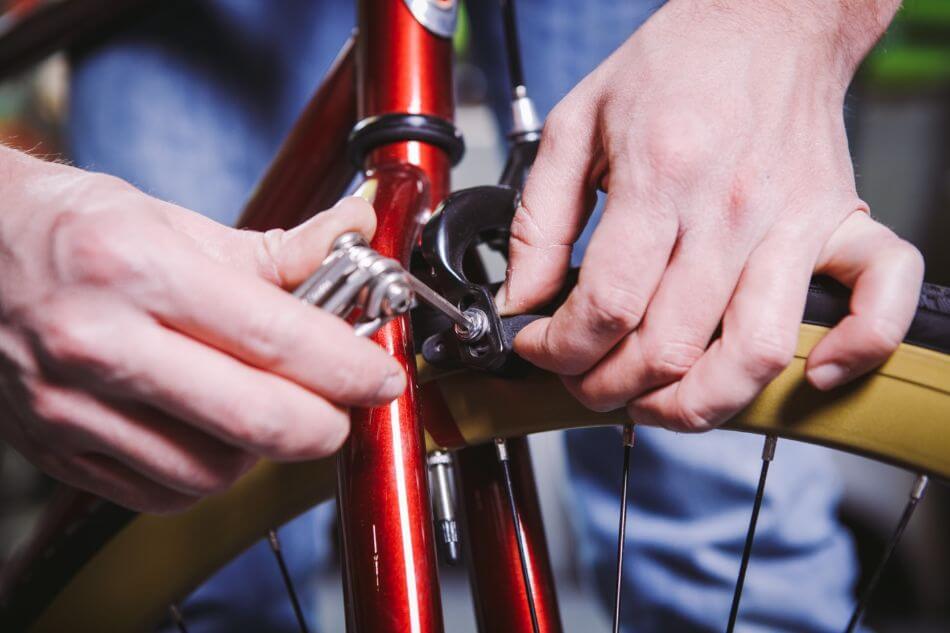
3. Undo the Anchor Bolt That Holds the Brake Cable at the Caliper
The brake cable is attached to the brake caliper with the ‘anchor bolt’. Unscrew the bolt just enough so the cable can slide around but doesn’t come out.
4. Pull More of the Cable Than Before Through the Anchoring Point
Pull the cable through the anchor bolt so that the pads are a bit closer to the rim than before, but not super tight on the rim so the wheel can’t turn. You can do this by gently squeezing the brakes together with one hand and grabbing the cable with the other. Hold it in that position and tighten the anchor bolt to preserve the adjustment.
5. Make Any Small Adjustments Using the Barrel Adjusters
If you need to fine-tune the cable tension after tightening the anchor bolt, you can utilize the barrel adjusters. Just remember that barrel adjusters are for minor changes. A barrel adjuster that’s too loose can break off since there aren’t enough threads engaged to attach it securely.
Don’t be afraid to go back and adjust the anchor bolt adjusting brakes and cable tension is a skill that takes time, and some bikes are easier to maintain than others! Be patient and remember that safe and reliable brakes are always worth the extra effort.
Got Disc Brakes? Here Are Some Tips
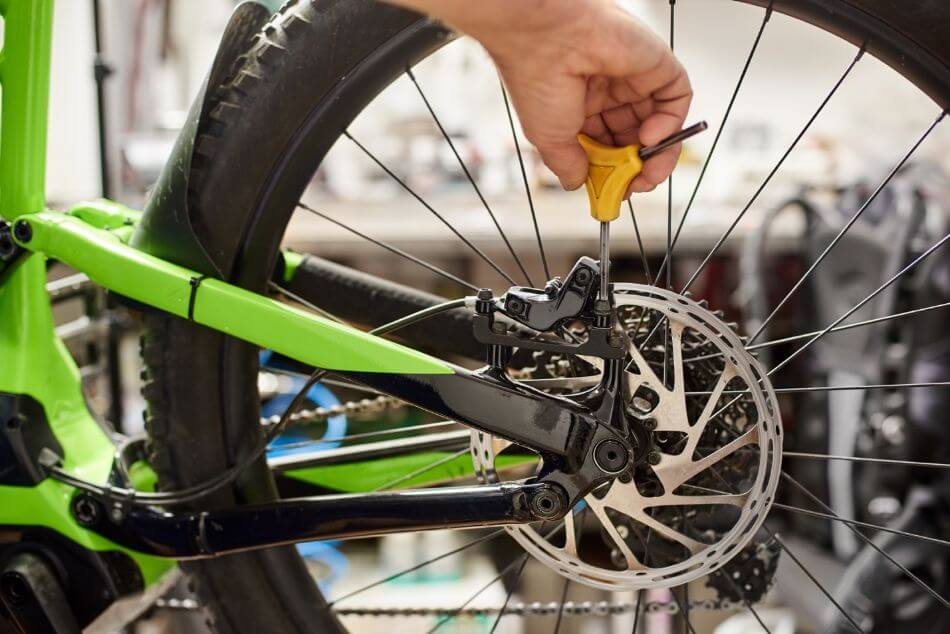
Disc brakes are more common than ever on all types of bikes. Previously only featured on mid- and top-tier mountain bikes, disc brakes are now included on many cheaper models as well as road and hybrid bikes.
There are two main types of disc brakes: mechanical and hydraulic. Mechanical means a cable mechanically connects the brake lever and caliper, just like in the rim brakes discussed above. If you can mechanical disc brakes, follow the same instructions if your cable needs tightening.
Disc brake pads, however, are a lot different from rim brake pads. Instead of the rim, they clamp onto a large metal rotor connected to the wheel hub, but most of the logic to make adjustments is the same. If you hear a squeak or metal ringing, this means your pads are rubbing on the rotor. Use the barrel adjusters to make small adjustments and check to see if the pads are worn past the wear line and need replacement.
Hydraulic brakes are best left for seasoned mechanics
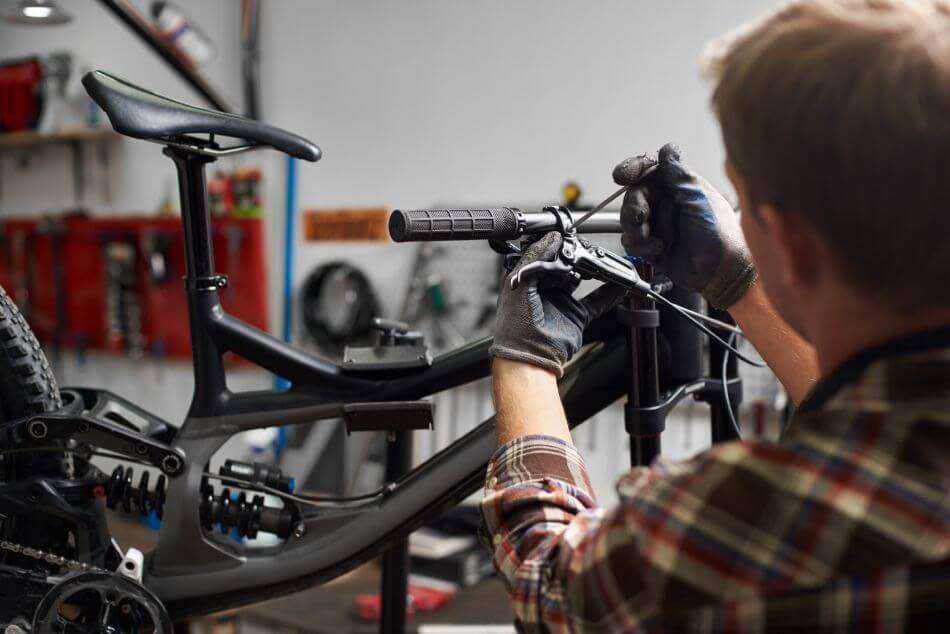
If your bike has hydraulic disc brakes, making brake adjustments is a much more involved process. The hydraulic system is completely sealed and a small error can snowball into bigger issues, so it’s better to be safe than sorry. I am a professional mechanic, and even I have to go slow when working with hydraulic brakes. If your brakes feel off or you notice something wrong, roll into your local bike shop and ask the expert mechanics there to help you out.
Tips for Long-Lasting Brakes
- Keep your brake pads, rims, and rotors free of any debris or grime. Little pebbles or similar foreign objects can wedge themselves in these small places and cause damage to the brake system.
- Check your brake pads for wear every couple of months. Depending on how much you ride, take a look at how healthy your brake pads are and if it’s time for a new pair.
- Take care with brakes after taking wheels off/on. Make sure the brakes are properly reattached after you take the wheel off/on to fit the bike in a car, change a flat, or install new tires.
Read more:
Frequently Asked Questions
When brakes are rubbing, it means one or both of the brake pads are too close to the rim or disc rotor. The caliper may not be centered, so make sure the pads are the same distance from the rim. Otherwise, loosen the cable tension a little bit.
Of course! By adjusting the brakes yourself, you save a trip to the bike shop and some cash too. Follow this guide to adjusting brakes, from diagnosing the issue all the way to double-check your handiwork.
This means that one or both of the brake pads is too close to the rim or rotor, slowing you down unnecessarily. You can normally feel the resistance while riding, hear a noise coming from the brakes, or test it by spinning the wheel while off the bike and observing if it stops spinning quicker than normal.
You can adjust brake cable tension by pulling more cable through the anchor bolt, where the end of the cable connects to the brake caliper. For smaller adjustments, you can twist the barrel adjusters located at the brake lever or down by the calipers.
Have more questions about how to adjust your bike’s brakes? We’re happy to help!

Jeffrey Brown is a writer, editor, and professional bike mechanic with over 7 years of experience working in full-service and community-based bike shops. As a bicycle educator, he has supported youth programs across the US that teach bike mechanics and life skills to prepare the next generation of cyclists.
Jeffrey began his professional mechanic career at his university bike co-op, so he recognizes the grassroots power of the cycling community. Initially self-trained as a mechanic, his subsequent positions as manager and lead educator gave him official training. He has won various awards and grants for his role as a bicycle and environmental advocate.