(Last updated on February 15th, 2023)
Thinking of learning how to ride a bike? Have you always wanted to learn how to ride a bike but didn’t know where to start? Are you trying to teach someone else? The time to start learning is right now, and this complete step-by-step guide is here to help! Our advice makes learning how to ride a bike stress-free and an enjoyable introduction to bike riding.
Riding a bike is a fabulous way to enjoy the outdoors and get some exercise at the same time. Learning this skill might seem like a daunting task, but following these tips and tricks will get you pedaling comfortably in no time.
Before you saddle up, take a look at this useful advice on how to stay motivated:
- Be patient: Learning to ride a bike takes time. Pick a moment to start learning where you aren’t pressed for time or feel pressured to succeed quickly. Some riders don’t learn in just one session take a break and return to the bike later. Riding a bike is physical work, so pace yourself so you don’t get overly tired.
- Believe in yourself: None of us are born knowing how to ride a bike. It’s a skill we have to learn and practice. Confidence is half the battle. Bikes are actually more stable at high speeds! Be sure to follow this guide to start with the proper steps and gradually work up to successful riding.
Step 1: The Right Equipment
Prepare yourself for success by having the appropriate equipment before you start. These recommendations will also make the learning process a lot more comfortable.
Start learning on a bike that fits you. You should be able to stand over the bike’s top tube (the highest bar on the frame) with a couple of inches to spare between the frame and your crotch. Not sure how to determine what size bike fits you best? Check out our complete guide to bike size charts here.
Safety is cool, and so are helmets. Always wear a helmet when you are riding a bike, even if you are by yourself or going slow. Make sure the helmet fits your head. It shouldn’t be too loose and move around easily, nor should it be too tight and poke your head uncomfortably in spots.
Helmets sit flat on your head (not much of your forehead should be showing) and the straps should lay close to your face.
Pick the right spot to learn. Like when learning how to drive, big, wide-open parking lots are a great choice because of their smooth surface and lack of obstacles. Other solid options are sports courts but watch out for poles or nets. Ideally, there is a slight slope to the area that will help during the gliding step.
Lower the seat a bit. Start with your feet flat on the ground when sitting on the seat. This leads to a strong posture with which to start every riding attempt. You’ll frequently be putting your feet on the ground to help you balance or catch you from falling.
Some people remove the pedals before they begin learning. This is up to you. Having the pedals out of the way can be helpful but not everyone has a pedal wrench handy.
Wear appropriate clothing. Biking is a great form of exercise and the right clothing will make it a much more comfortable experience. Long pants or sleeves can be a first layer of defense against any minor scrapes.
Don’t wear overly baggy pants or long skirts because they could get caught up with the pedals or gears. Roll up your right pant leg for extra style points and to avoid it getting stained with bike grease from the crankset.
Feel free to wear additional safety gear such as knee and elbow pads. It’s not necessary but can protect against scrapes and is a great idea for young children.
Step 2: Practice Mounting The Bike
Getting on and off the bike should be an easy and fluid movement. It takes some getting used to but it’s important for safety in situations where you might need to hop of the bike quickly, like stopping at intersections.
Stand to one side of the bike while gripping the handlebars and swing your leg over the back wheel to the other side. Lean the bike towards you while doing this to make it easier (and lower) to mount. Repeat this process several times to perfect getting on and off the bike.
Step 3: Test The Brakes
Learning how to ride a bike also involves learning how to stop a bike safely. Familiarize yourself with your bike’s brakes and brake levers. Stand next to the bike and squeeze the levers, noting how much pressure it requires. Next, slowly walk the bike forward and engage the brakes to get a feel of how they engage.
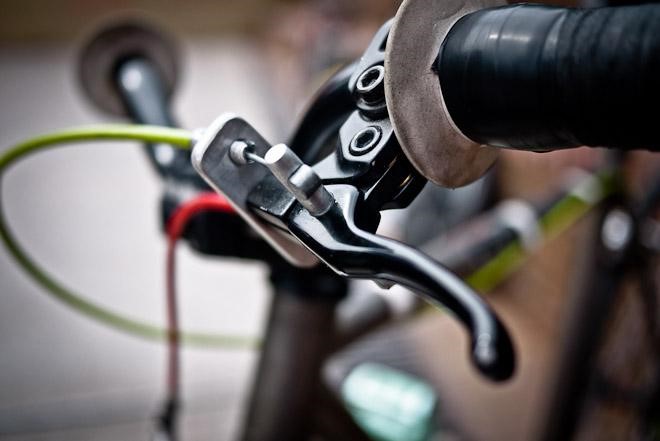
Remember that one brake (typically the left) stops the front wheel and the other brake (right side) controls the rear wheel. When riding, engage both brakes evenly for more stopping power and to avoid lurching over the handlebars if you only squeeze the front brake.
Step 4: Striding and Gliding
Now it’s time to hop on the bike! Mount the bike and sit on the saddle with both feet planted on the ground. Take small steps to propel the bike forward, increasing the stride as you pick up speed. You can have gravity assist you by selecting a practice area with a downward slope.
Because you are alternating legs during this ‘running’ motion, you might rock from side to side. Your balance comes from your hips and torso, so keep your core muscles engaged. Don’t stick your legs too far away from the bike as that will throw off your balance.
As the strides get longer, try to maintain your balance and glide in a straight line without touching the ground with your feet. These gliding moments will be short at first but will increase as you improve your balance and pick up speed. Try to glide feet not touching the ground for two to three seconds. Now try making wide turns to practice steering the handlebars. Start gradually to get the hang of it and don’t turn too sharply.
Step 5: Practice Safe Braking
While you are getting better at gliding, practice stopping the bike by squeezing the brake levers. Make sure there are no obstacles in your path so you can start by braking gradually. Always squeeze both brakes simultaneously.
A common mistake is to squeeze only the front brake. If you are carrying enough speed and only use the front brake, you could lurch forward off the seat and towards the handlebars ouch. The front brake provides most of stopping power but works jointly with the rear brake to be properly balanced.
Prevent that by always ‘covering’ your brakes which means you have at least two fingers on the brake levers at all times. Covering the brakes is not squeezing or pulling the brakes but having your fingers rest atop the levers ready to stop the bike.
Pro Tip: Where Your Eyes Go, You Go
I wish someone had told me this piece of advice when I learned how to ride a bike. Point your eyes in the direction you want to go. Our sight prepares the rest of our body to follow directions. When you look to the left, our body makes tiny, automatic adjustments to help us go left.
It’s also important to always look up and look forward. Looking up helps us open up and relax our bodies, and when you look forward, you’re more likely to go straight. Peering down at the pedals and your legs can throw off your balance.
Step 6: Learn to Pedal
It’s time to use the pedals! One of the most important skills is starting to pedal from a stopped position. Place one foot on the ground and the other on the pedal, with the pedal at the 1 or 2 o’clock position. Having the pedal that high up allows you to generate sufficient momentum when you push your leg down to start pedaling.
Getting rolling with a strong downstroke with the foot already on the pedal and then place the other foot on the second pedal. You’ll have the urge to look down at your legs, but you’ll intuitively know where the pedals are and can look straight ahead after a while.
The trick is to get the second foot pedaling as quickly as possible to complete the first rotation of the crankset and start building a rhythm. If you start to lose your balance, don’t panic and squeeze the brakes hard and jolt to a harsh stop. You’re learning how to coordinate legs and hands at the same time so practice makes perfect.
This is one of the most difficult steps, so be patient and take your time to reflect on little adjustments you can make. Take a small break if you get frustrated— you’ll come back refreshed and ready to try again. Attempt to pedal for 5-10 seconds without your feet touching the ground.
Step 7: Steering And Turning
Once you’ve made it to the point where you can pedal forward comfortably stopping, you’ve made it past the hardest part! Now you can put it all together and practice steering and turning.
Changing direction on a bike is equal parts using the handlebars and using your body. Remember to look where you want to go and lean slightly to that side, too. The bike will feel more natural and stable when you turn the handlebars and lean slightly with your body..
Steering by only using the handlebars or turning in too sharply can lead to the front wheel over-rotating and coming to an abrupt stop. Play around with wider curves first, and then practice making tighter turns to refine your skills.
Remember to continue practicing good braking techniques. Now that you feel more comfortable, you can try braking more suddenly and observe how the bike, and your own body responds.
Step 8: Try Going Different Speeds
You’re riding a bike and have developed a new skill; congratulations! But just like any other skill, there’s always room for improvement. Stay in the same learning area or venture into the neighboring zone to ride at different speeds and on different terrain (pavement, sidewalk, dirt, speed bumps, etc.). The grass is a softer landing if you happen to fall but it makes it much harder to steer and pick up speed.
Ride the bike at different speeds to better understand how it handles in different situations. A fun challenge is to see how slow you can go while still remaining upright and not touching the ground. This is a great way to practice balance and to understand how your core muscles are integral to balancing.
I don’t recommend pedaling as fast as you can just yet, but try riding with some velocity and then bringing the bike to a complete stop. Once you’re out on the road or bike paths, obstacles can come up unexpectedly, so you should be ready to stop quickly.
Step 9: Pedal Up a Slope
A test of both fitness and bike riding ability, going up hills is the last skill in this guide. If you learned to ride on a slight downhill gradient, try pedaling up the slope. Slower speeds while going uphill requires better balance, and the bike’s handling changes a little when it points upwards. Once you master how to go up and down hills, there’s no limit to where you can ride next!
You May Also Like:
Frequently Asked Questions
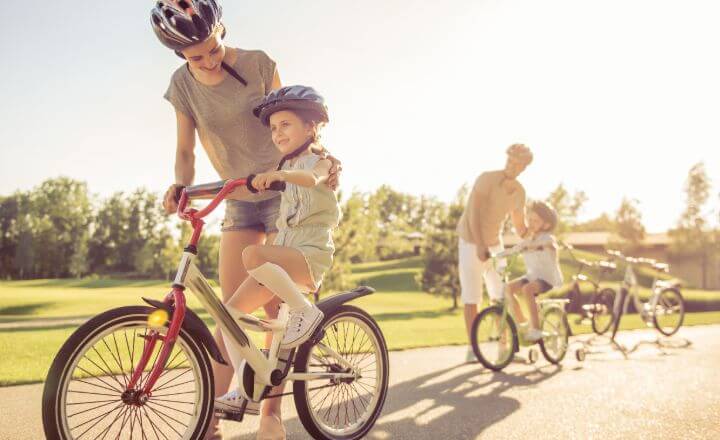
Many people have taught themselves how to ride a bike. Learning takes time, so be patient and go step by step. It’s easier to learn and stay motivated if you have a friend or family member with you to help out. In the case of young children practicing bike skills, parents or older siblings should be present.
This varies for every new rider, but it typically takes 2-3 sessions to feel comfortable biking without assistance. These are sessions of around an hour each, practicing the beginner bike skills. Bike riding is a complex movement that requires coordination, so practice makes perfect.
The main steps to learning how to ride a bike are having the ride equipment, gliding without touching the pedals to refine your sense of balance, starting from a stopped position, and pedaling on flat ground. Refer back to this guide for more detailed instructions and tips.
Learning to ride a bike can seem overwhelming and difficult at first, but the right attitude can make it an enjoyable experience. Picking up the skill of riding a bike is possible for everyone, but some people might have a harder time. Novice riders that have mobility issues or are overweight may take longer to learn.
Have any additional questions about learning how to ride a bike? Drop us a message, and we’re happy to help. Good luck as you start learning this new skill and enjoy the many bike rides that will follow. Happy trails and safe riding!

Jeffrey Brown is a writer, editor, and professional bike mechanic with over 7 years of experience working in full-service and community-based bike shops. As a bicycle educator, he has supported youth programs across the US that teach bike mechanics and life skills to prepare the next generation of cyclists.
Jeffrey began his professional mechanic career at his university bike co-op, so he recognizes the grassroots power of the cycling community. Initially self-trained as a mechanic, his subsequent positions as manager and lead educator gave him official training. He has won various awards and grants for his role as a bicycle and environmental advocate.