(Last updated on January 26th, 2023)
Are your bike’s brakes not working properly? Follow this step-by-step guide to adjusting the brakes so you can get back to enjoying the trails as quickly and safely as possible. We’ve included complete tutorials for all three main brake types: V-brakes, caliper, and disc brakes.
How to Know When Brakes Need Tightening
Riders should regularly inspect their brakes, but sometimes problems occur that require immediate attention. It’s best to first diagnose the issue so you can make the appropriate fix, saving you time and headaches. Read through the most common brake problems below and find out how to repair them fast.
Problem 1: I Squeeze the Brake Lever, but I Barely Slow Down
Brakes that barely work, or not at all, are a serious safety hazard but can normally be fixed by tightening the brake cable. The brake cable may have stretched over time or pads have worn down. Pull more cable through to tighten the brakes and you’ll have more sensitive stopping power.
Tip: check that the brake cable hasn’t slipped out of the brake lever or caliper this can give the appearance that the brake is broken, but it’s really just out of place.
Problem 2: Pesky, Squeaky Brakes
A problem that’s easy to recognize but more difficult to fix, squeaky brakes are typically the result of misadjusted brake pads. Loosen the pads to reset them and tighten them up with the front of the pad slightly closer to the rim than the rear of the pad. This is called “toe-ing in” brake pads and we’ll talk more about it later.
Problem 3: Gradual Loss of Brake Performance
If your brakes seem a little off, it’s best to give them a closer look. Maybe your rim is out of true and rubs against the pads. Or maybe there is grime on the pads,decreasing their stopping power. Give the brake system a good clean and check the cable tension.
Problem 4: My Brakes Make a Scraping Sound
A scraping rather than squeaking sound can indicate that the brake pads need to be replaced. Worn-down pads lose all their rubber and make contact with the rim with their harder metal material instead. This can damage the rim, leading to a much costlier repair down the road.
How Do I Know What Kind of Bike Brakes I Have?
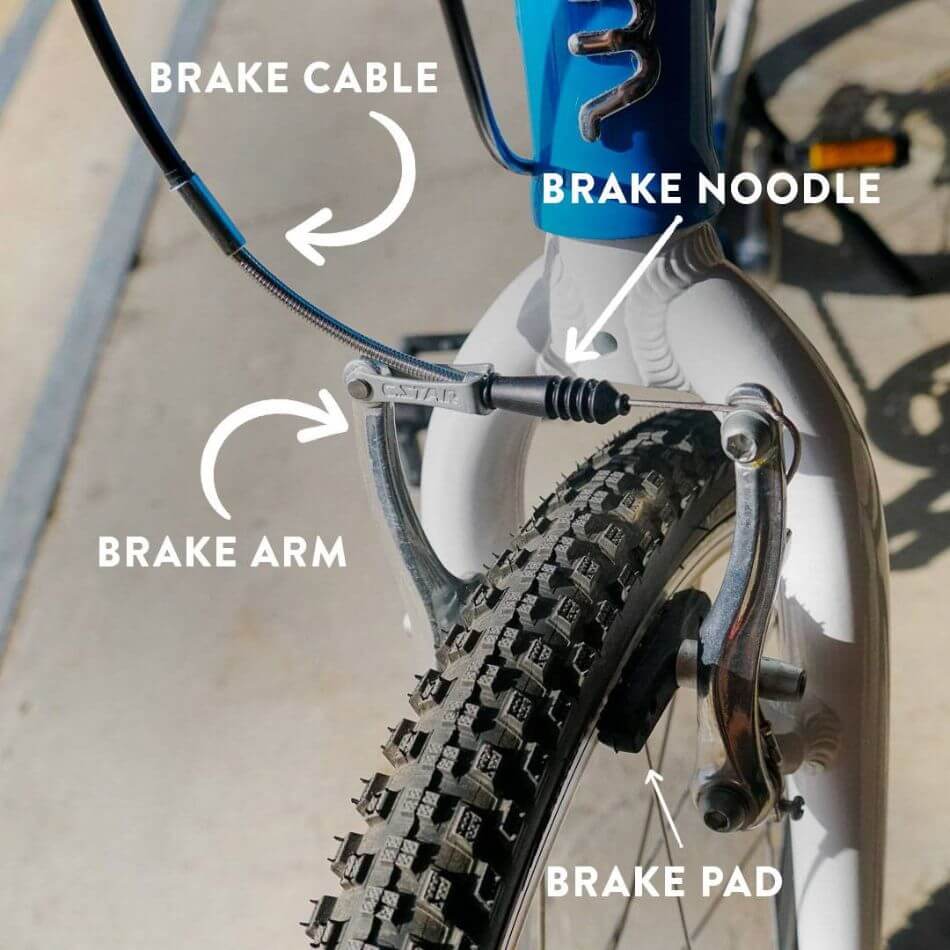
V-brakes
V-brakes are some of the most common designs out there and work via two long brake arms mounted to the frame, connected by a brake cable. Check out the picture below to see if you have V-brakes.
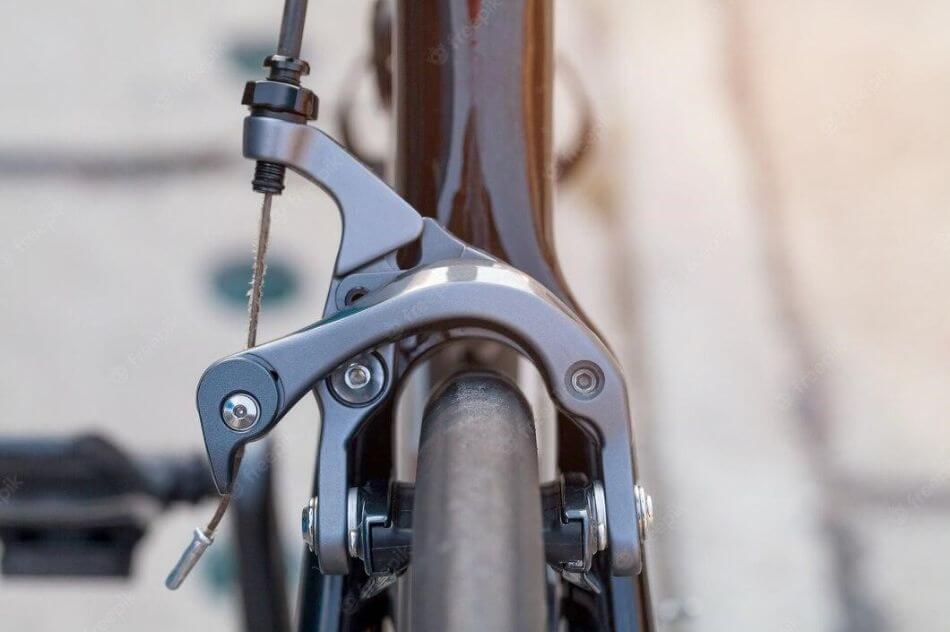
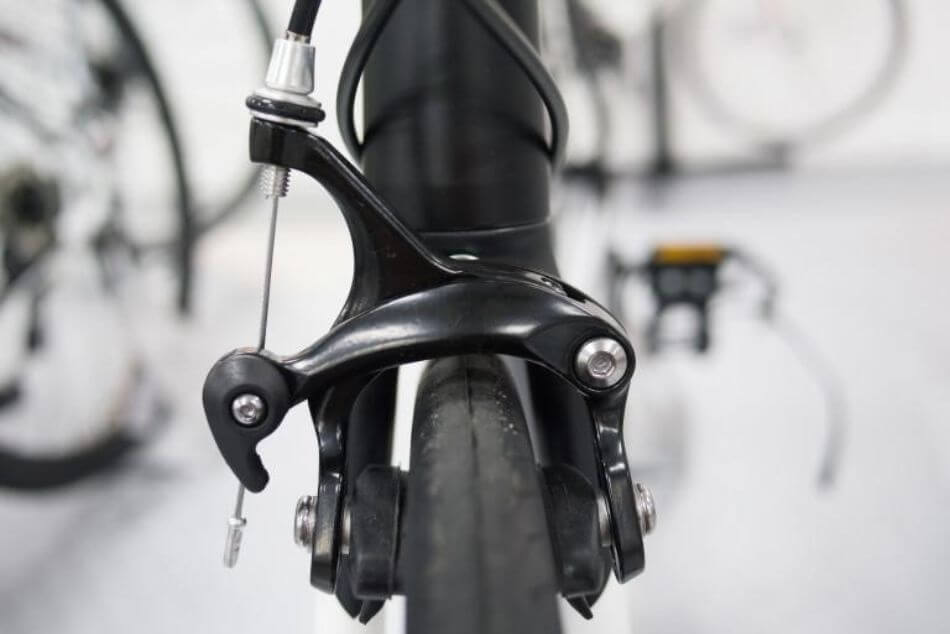
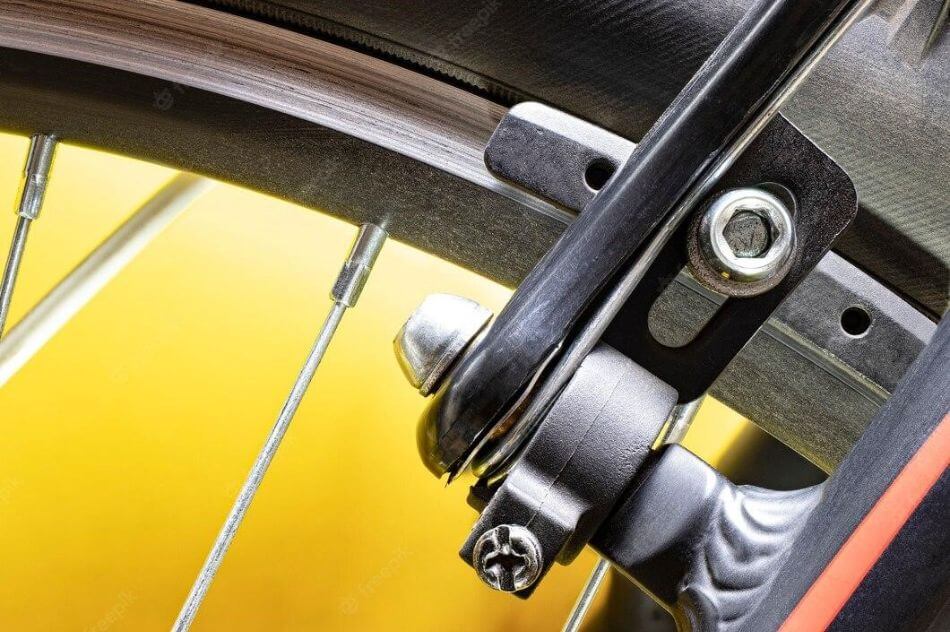
Caliper Rim Brakes
Caliper brakes are a popular choice on higher-end bikes and have a smaller profile than V-brakes. The two brake arms move together even through the cable only attached to one of them. Here’s a helpful photo to check if your bike has caliper brakes:
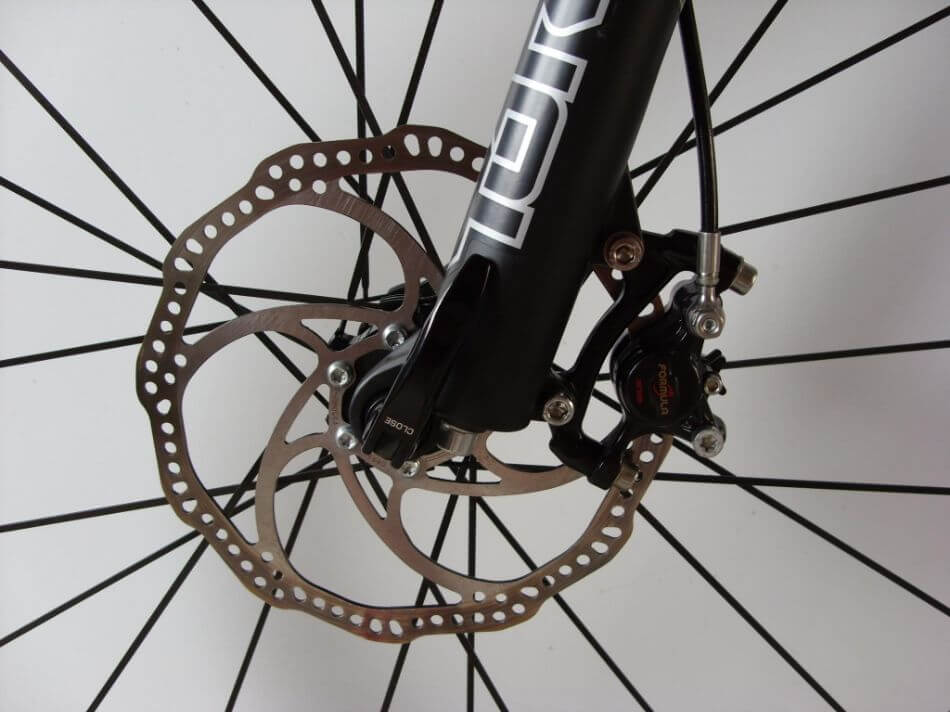
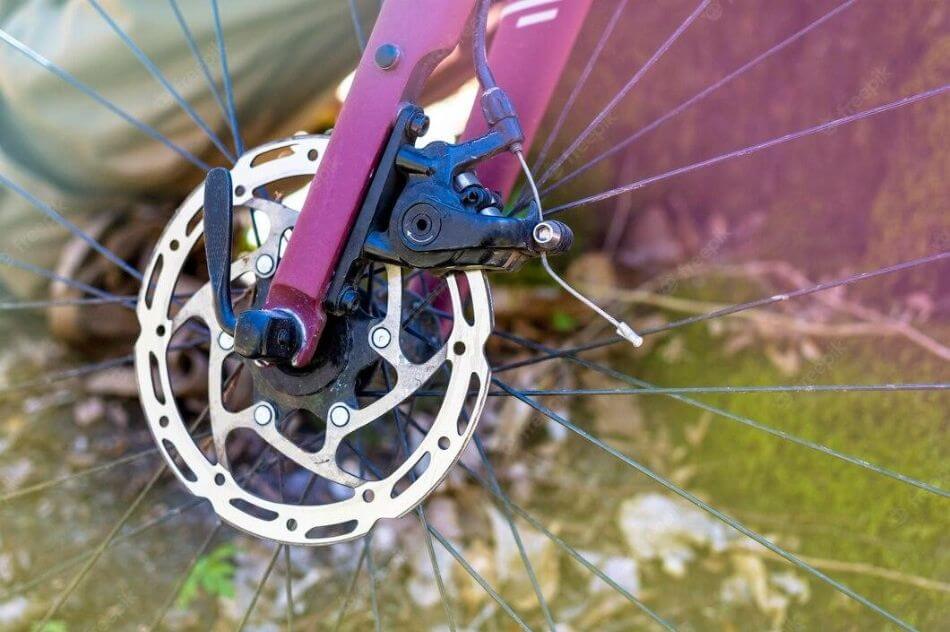
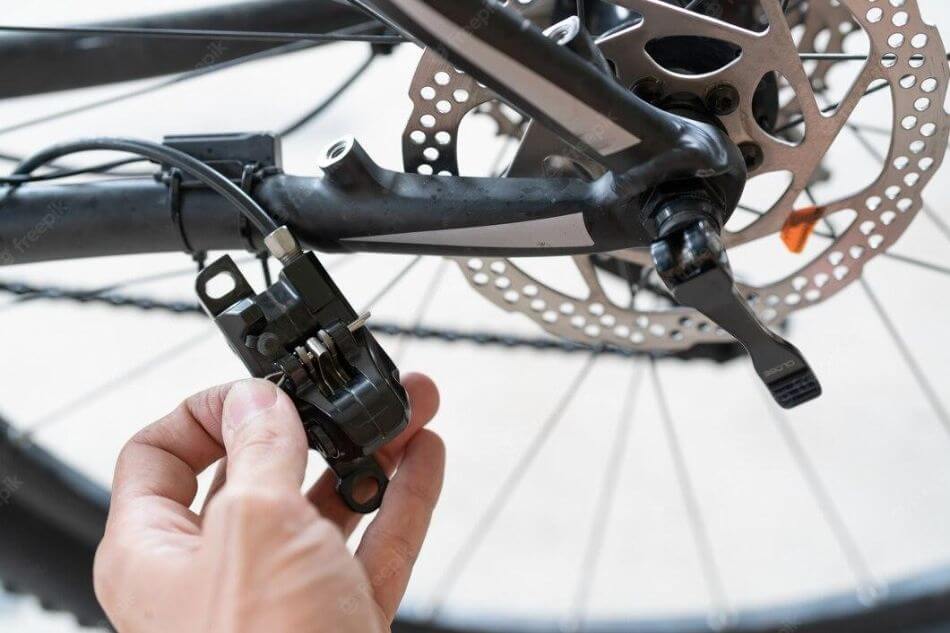
Disc Brakes
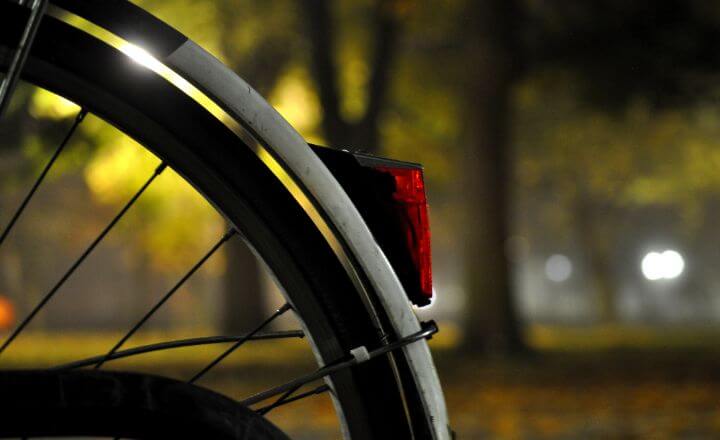
Disc brakes are easy to identify and feature a large metal disc rotor mounted to the wheel hub. The disc brake caliper has strong brake pads that squeeze the rotor to slow the bike down.
How to Tighten Bike Brakes
While I have included a complete tutorial for each of the three main brake types, remember you can make easy, quick adjustments on the fly using the barrel adjusters located near the brake levers or calipers. These small adjusters are ideal for removing cable stretch and fine-tuning brake performance. Turn them counter-clockwise, exposing more top threads, to tighten the brake cable.
V-Brakes
Step 1: Test by spinning the wheel and squeezing the brakes
Spin the wheel to check that the rim is true and isn’t too close to one side of the brakes at certain spots. Pull the brake lever to observe the cable tension and how much you might need to tighten it.
Step 2: Loosen the anchor bolt to release cable tension
Use an Allen key (probably 5mm) to slightly loosen the anchor bolt on the right brake arm. The cable is still attached but can move smoothly so you can adjust the tension. Use one hand to squeeze both brake arms and pads close to (but not quite touching) the rim. You may need to pull on the cable to move it through the anchor point and remove the slack. The ideal gap between the rim and brake pads is around a couple of millimeters on either side.
Step 3: Tighten the anchor bolt
After achieving your desired cable tension, retighten the anchor bolt to secure the cable in place. Check the adjustment by squeezing the brake lever several times this centers things back up and will tell you if everything is working properly. Don’t stress if you need to make another revision to the cable tension.
Step 4: Adjust brake pad placement
Squeeze the brake lever, or simply push the brake arm towards the rim, to see where the brake pads make contact with the wheel. Brake pads should contact the rim in the center of the braking track. The pads should be level and flush with the rim rather than being at an angle. Make sure no part of the pad hits the tire or goes below the rim this can wear down the tire wall and cause less efficient braking.
To adjust the pads, loosen their bolt slightly so they can move freely. Then press them against the center of the rim by squeezing the brakes or pushing the brake arm. The pad’s specialized washers will allow them to sit flush with the rim. When they are in the right position, tighten the brake pad bolt. Tip: you may have to hold the pad firmly to avoid the bolt-tightening action from rotating the actual pad.
Step 5: Check the distance between pad and rim on either side
Even with correct cable tension and pad placement, there still may be a final adjustment. Make sure the distance between the brake pad and rim is equal on both sides. Maybe one side is rubbing? Or do the pads hit the rim at different times? Synchronized brake pads are the key to safe, effective braking.
Step 6: Adjust the set screws
V-brakes have useful little screws at the bottom of each brake arm. These “set screws” adjust or “set” the amount of tension in the small metal springs inside each brake arm. Changing the tension moves the brake arm and pad closer or farther away from the rim.
If a brake pad is rubbing against the rim, turn in the set screw on that same side this will push the pad away from the rim. If a brake arm doesn’t move, it probably needs more tension, so turn in the screw a few rotations. Continue making small adjustments until both pads are roughly the same distance from the rim and make contact at the same time.
Caliper brakes
Step 1: Center the brake caliper
The entire caliper can rotate, so it’s important to align the system with the wheel. Squeeze the brake a few times and observe if the brake pads hit the rim at the same time. If one rim hits too early or there is the unequal spacing on either side, you may need to realign the caliper. Loosen the bolt on the backside of the fork, center the brake, and retighten the caliper.
Step 2: Adjust cable tension
Caliper brakes also have an anchor bolt that sets the desired cable tension. Depending on your preference, pull more cable through to move the pads closer to the rim for more sensitive braking, or leave more of a gap for looser braking. Remember to retighten the bolt firmly. Tip: riders can also utilize the barrel adjuster at the top of the caliper for smaller adjustments on the fly without the need for tools.
Step 3: Close the quick release lever
Most caliper brakes have a small flip switch to help get tires in and out easily without completely undoing the brakes. This lever in the up position loosened the brakes so you can remove a tire (since they are slightly wider than the rim). In the down position, the pads are closer to the rim. When adjusting your brakes and riding, keep this lever closed.
Step 4: Align brake pads
Make sure the brake pads are level with the rim and make good contact. Caliper brake pads don’t have the complex series of washers that v-brakes do, so this is a relatively simple adjustment. The pads should be centered on the braking surface of the rim and shouldn’t be angled so that the pad hits the tire sidewall or misses the rim entirely by being too low. Tighten the pads up firmly when you’ve hit the sweet spot.
Step 5: Fine-tuning
Squeeze the brake lever several times to double-check everything is working properly. If you need to make a small adjustment, use the handy barrel adjuster at the top of the caliper. The more exposed threads you see at the top of the adjuster, the tighter the cable and closer the pads are to the rim. If you’ve just replaced the cable, this will be a useful fix to offset eventual cable stretch that happens over time.
Mechanical Disc Brakes
Step 1: Check wheel and rotor alignment
Make sure the wheel is correctly installed in the dropouts rather than sitting at an angle. Also, check that the disc rotor itself isn’t bent or misaligned. Straighten out the rotor with a special tool before you move on to adjusting the brake caliper.
Step 2: Reset the caliper position
Gently loosen the two bolts that secure the caliper (and pads) so the brake can move freely. Squeezing the brake will cause the brake pads to grab the rotor and automatically realign the caliper. Retighten the bolts and check if the rotor still rubs against the pads. Even if you can’t see the rubbing, you can typically hear a scraping sound if they are too close. Tip: be patient and don’t worry if this step takes a few tries.
Step 3: Manually adjust the caliper
If the caliper doesn’t realign automatically, you can try positioning the caliper by hand. Look straight down at the pads and rotor to see which side is rubbing. The gaps are small, so you may need a flashlight or a better angle to see what’s going on. Adjust the caliper manually and secure it into position and test it out.
Frequently Asked Questions
Brake levers can feel loose due to a broken or missing spring from inside the lever mechanism. Depending on your brake lever, this may be repairable or you may be better off purchasing a new lever which is typically very affordable. Make sure your cable and housing is in good shape free of kinks and rust, easily slotting into the barrel adjuster near the lever.
The easiest and quickest way to tighten brakes is via the barrel adjusters near the brake levers or caliper. This method is ideal for small adjustments on the fly to remove any cable stretch over time. If a larger repair is needed, follow the steps above to pull the cable through the anchor bolt and tighten up the brakes.
Brakes normally squeak when the brake pads are positioned at the wrong angle. Remember to “toe-in” the brake pads by angling them so the front of the pad is slightly closer to the rim than the rear of the pad.
Most brake problems are fixed by either adjusting the brake pads or tightening the cable tension. Check out the simple steps above according to the type of brakes your bike has. Sometimes you may need to replace the pads, cables, or cable housing for a more complete fix.

Jeffrey Brown is a writer, editor, and professional bike mechanic with over 7 years of experience working in full-service and community-based bike shops. As a bicycle educator, he has supported youth programs across the US that teach bike mechanics and life skills to prepare the next generation of cyclists.
Jeffrey began his professional mechanic career at his university bike co-op, so he recognizes the grassroots power of the cycling community. Initially self-trained as a mechanic, his subsequent positions as manager and lead educator gave him official training. He has won various awards and grants for his role as a bicycle and environmental advocate.